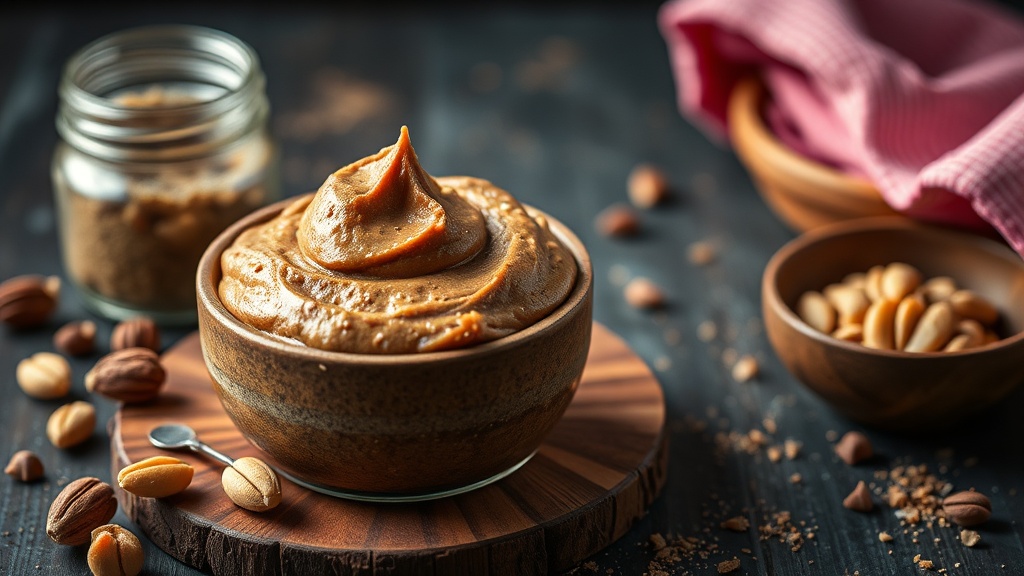
How to Make Your Own Nut Butters at Home

A single jar of high-end, organic almond butter can easily cost $8 to $10 at a grocery store like Whole Foods or Trader Joe's. When you multiply that by three kids who eat peanut butter sandwiches every single school day, that small luxury becomes a massive dent in your weekly grocery budget. Making your own nut butters at home reduces the cost per ounce significantly, allows you to control exactly how much sugar and oil is added, and ensures your family isn't consuming unnecessary palm oil or hydrogenated fats. This guide covers the specific tools, ingredients, and methods you need to create creamy or crunchy nut butters using nothing more than a blender or food processor.
The Cost Breakdown: Store-Bought vs. Homemade
To understand why this is a budget-friendly move, look at the math. A 16-ounce jar of premium peanut butter often carries a high markup. If you buy a large 40-ounce bag of dry roasted peanuts at a warehouse club like Costco or Sam's Club, the price per pound drops drastically. Even when you add a small amount of high-quality honey or sea salt, you are still paying significantly less than the retail price of a pre-made jar. This applies to cashew butter, almond butter, and even sunflower seed butter, which is often a much more expensive specialty item in the baking aisle.
Beyond the price, homemade nut butter eliminates the "hidden" costs of poor nutrition. Many commercial brands use cheap vegetable oils to maintain texture, which can lead to inflammation and less satiety. When you make it yourself, you are investing in nutrient-dense fats that keep your kids full longer during school hours, potentially reducing the need for expensive processed snacks later in the afternoon.
Essential Equipment for Nut Butter Making
You do not need a professional-grade kitchen to do this, but the type of tool you use will dictate the final texture. Here are the three most common options:
- High-Speed Blender: If you own a Vitamix or a Ninja, you can make nut butter easily. These machines have powerful motors that can handle the friction and heat generated by grinding nuts.
- Food Processor: This is often the best choice for home cooks. A standard 14-cup food processor (like a Cuisinart) provides enough surface area to move the nuts around, preventing the motor from overheating.
- Standard Blender: A regular blender can work, but it is much harder. You will likely need to stop frequently to scrape down the sides with a spatula, and there is a higher risk of the blades getting stuck.
Regardless of the tool, ensure your equipment is completely dry. Even a tiny drop of water can cause the oils to separate or create a gritty, unappetizing texture. If you are using a food processor, avoid using a plastic blade if possible; a metal blade is more efficient at breaking down the cellular structure of the nuts to release their natural oils.
Choosing Your Base Ingredients
The quality of your nut butter starts with the raw or roasted nut. For the best results, I recommend buying nuts that are already roasted and salted to save time, or raw nuts if you want to control the salt content entirely.
Peanut Butter
Peanuts are the most budget-friendly option. You can use unsalted dry roasted peanuts for a very clean flavor. If you want a "crunchy" version, simply set aside a handful of the peanuts and pulse them briefly in the processor before adding them to the main batch.
Almond Butter
Almond butter is higher in Vitamin E and much more affordable when made at home. I recommend using whole, skin-on almonds. The skin adds a slightly more rustic texture and more fiber. If you want a smoother, "creamy" almond butter, you may need to add a teaspoon of almond oil or avocado oil to help the blending process along.
Sunflower Seed Butter (SunButter)
This is an excellent option for nut-free households or school lunches. Sunflower seeds are often cheaper than almonds and can be processed into a very creamy consistency. This is particularly useful if you are looking for ways to use cheap pantry staples to supplement your protein intake.
Step-by-Step Instructions for Creamy Nut Butter
Follow these steps to ensure you don't burn out your motor or end up with a dry powder.
- Prep the Nuts: If you are using raw nuts, roast them in the oven at 350°F for about 10-15 minutes until they are fragrant. This step is non-negotiable for flavor and texture; roasted nuts release their oils much more easily than raw ones.
- Initial Pulse: Place the nuts in the food processor. Pulse 10 to 15 times. At this stage, the nuts will look like a coarse meal or flour.
- The Thick Paste Stage: Continue processing for 1-2 minutes. The mixture will turn into a thick, heavy paste that may start to stick to the sides. Use a spatula to scrape the sides down every 30 seconds.
- The Liquid Stage: Once the paste begins to look shiny, it is starting to release its oils. This is the point where you can add your "extras" (honey, salt, or a touch of oil).
- Final Blend: Continue blending for another 2-3 minutes. Do not overwork the motor. If the motor feels hot to the touch, stop and let it rest for a minute. The texture will transition from a thick paste to a smooth, pourable cream.
Flavor Variations and Add-ins
Once you master the basic technique, you can experiment with different profiles to keep your family from getting bored. Always add your flavorings during the "Liquid Stage" mentioned above.
Chocolate Peanut Butter: Add 2 tablespoons of unsweetened cocoa powder and 1 tablespoon of maple syrup or honey. This is a great way to make a "healthier" version of a dessert spread for the kids.
Honey Cinnamon Almond Butter: Add 1 tablespoon of honey and 1/2 teaspoon of ground cinnamon. This is delicious on top of oatmeal or sliced apples.
Troubleshooting Common Issues
The texture is too gritty: This usually happens if the nuts weren't roasted enough or if the blender isn't powerful enough to break down the particles. To fix this, add 1 teaspoon of neutral oil (like grapeseed or avocado oil) and blend on high for another 2 minutes.
Storage and Safety Tips
Homemade nut butters do not contain the preservatives and stabilizers found in commercial brands, so they have a shorter shelf life. Store your nut butter in an airtight glass jar (like a Mason jar) and keep it in the refrigerator.
Refrigerated Storage: Most homemade nut butters will stay fresh and delicious in the fridge for about 1 to 2 months. The cold temperature also helps prevent the oil from separating as quickly. If you find the butter has become too firm in the fridge, let it sit at room temperature for 10 minutes before spreading.
Freezing: If you make a large batch, you can freeze nut butter in silicone ice cube trays. Once frozen, transfer the cubes to a freezer bag. This is a great way to portion out small amounts for smoothies or quick snacks, ensuring nothing goes to waste.
By taking the time to make your own nut butters, you are taking control of your family's nutrition and your grocery budget. It is a simple, repeatable skill that pays dividends in both health and savings.
Steps
- 1
Roast your nuts or seeds to enhance flavor
- 2
Let them cool slightly to maintain texture
- 3
Blend on high speed until oils release
- 4
Add a pinch of salt or honey if desired
- 5
Store in a sealed jar in the refrigerator